Painting the Dollhouse + 8 Simple Color Scheme Ideas for Crafting
It’s been a month since I first shared the dollhouse I’m renovating for my daughter, and it’s already looking a lot different! In that first post, I shared some “before” photos, my color palette and plans. Now the dollhouse has been painted, I have some progress shots and tips to share! Read on for my tips for how to paint a 1:12 inch scale dollhouse plus a collection of fresh, modern color scheme ideas for crafting miniatures, or really anything else!
To see what the dollhouse looked like before, click here.
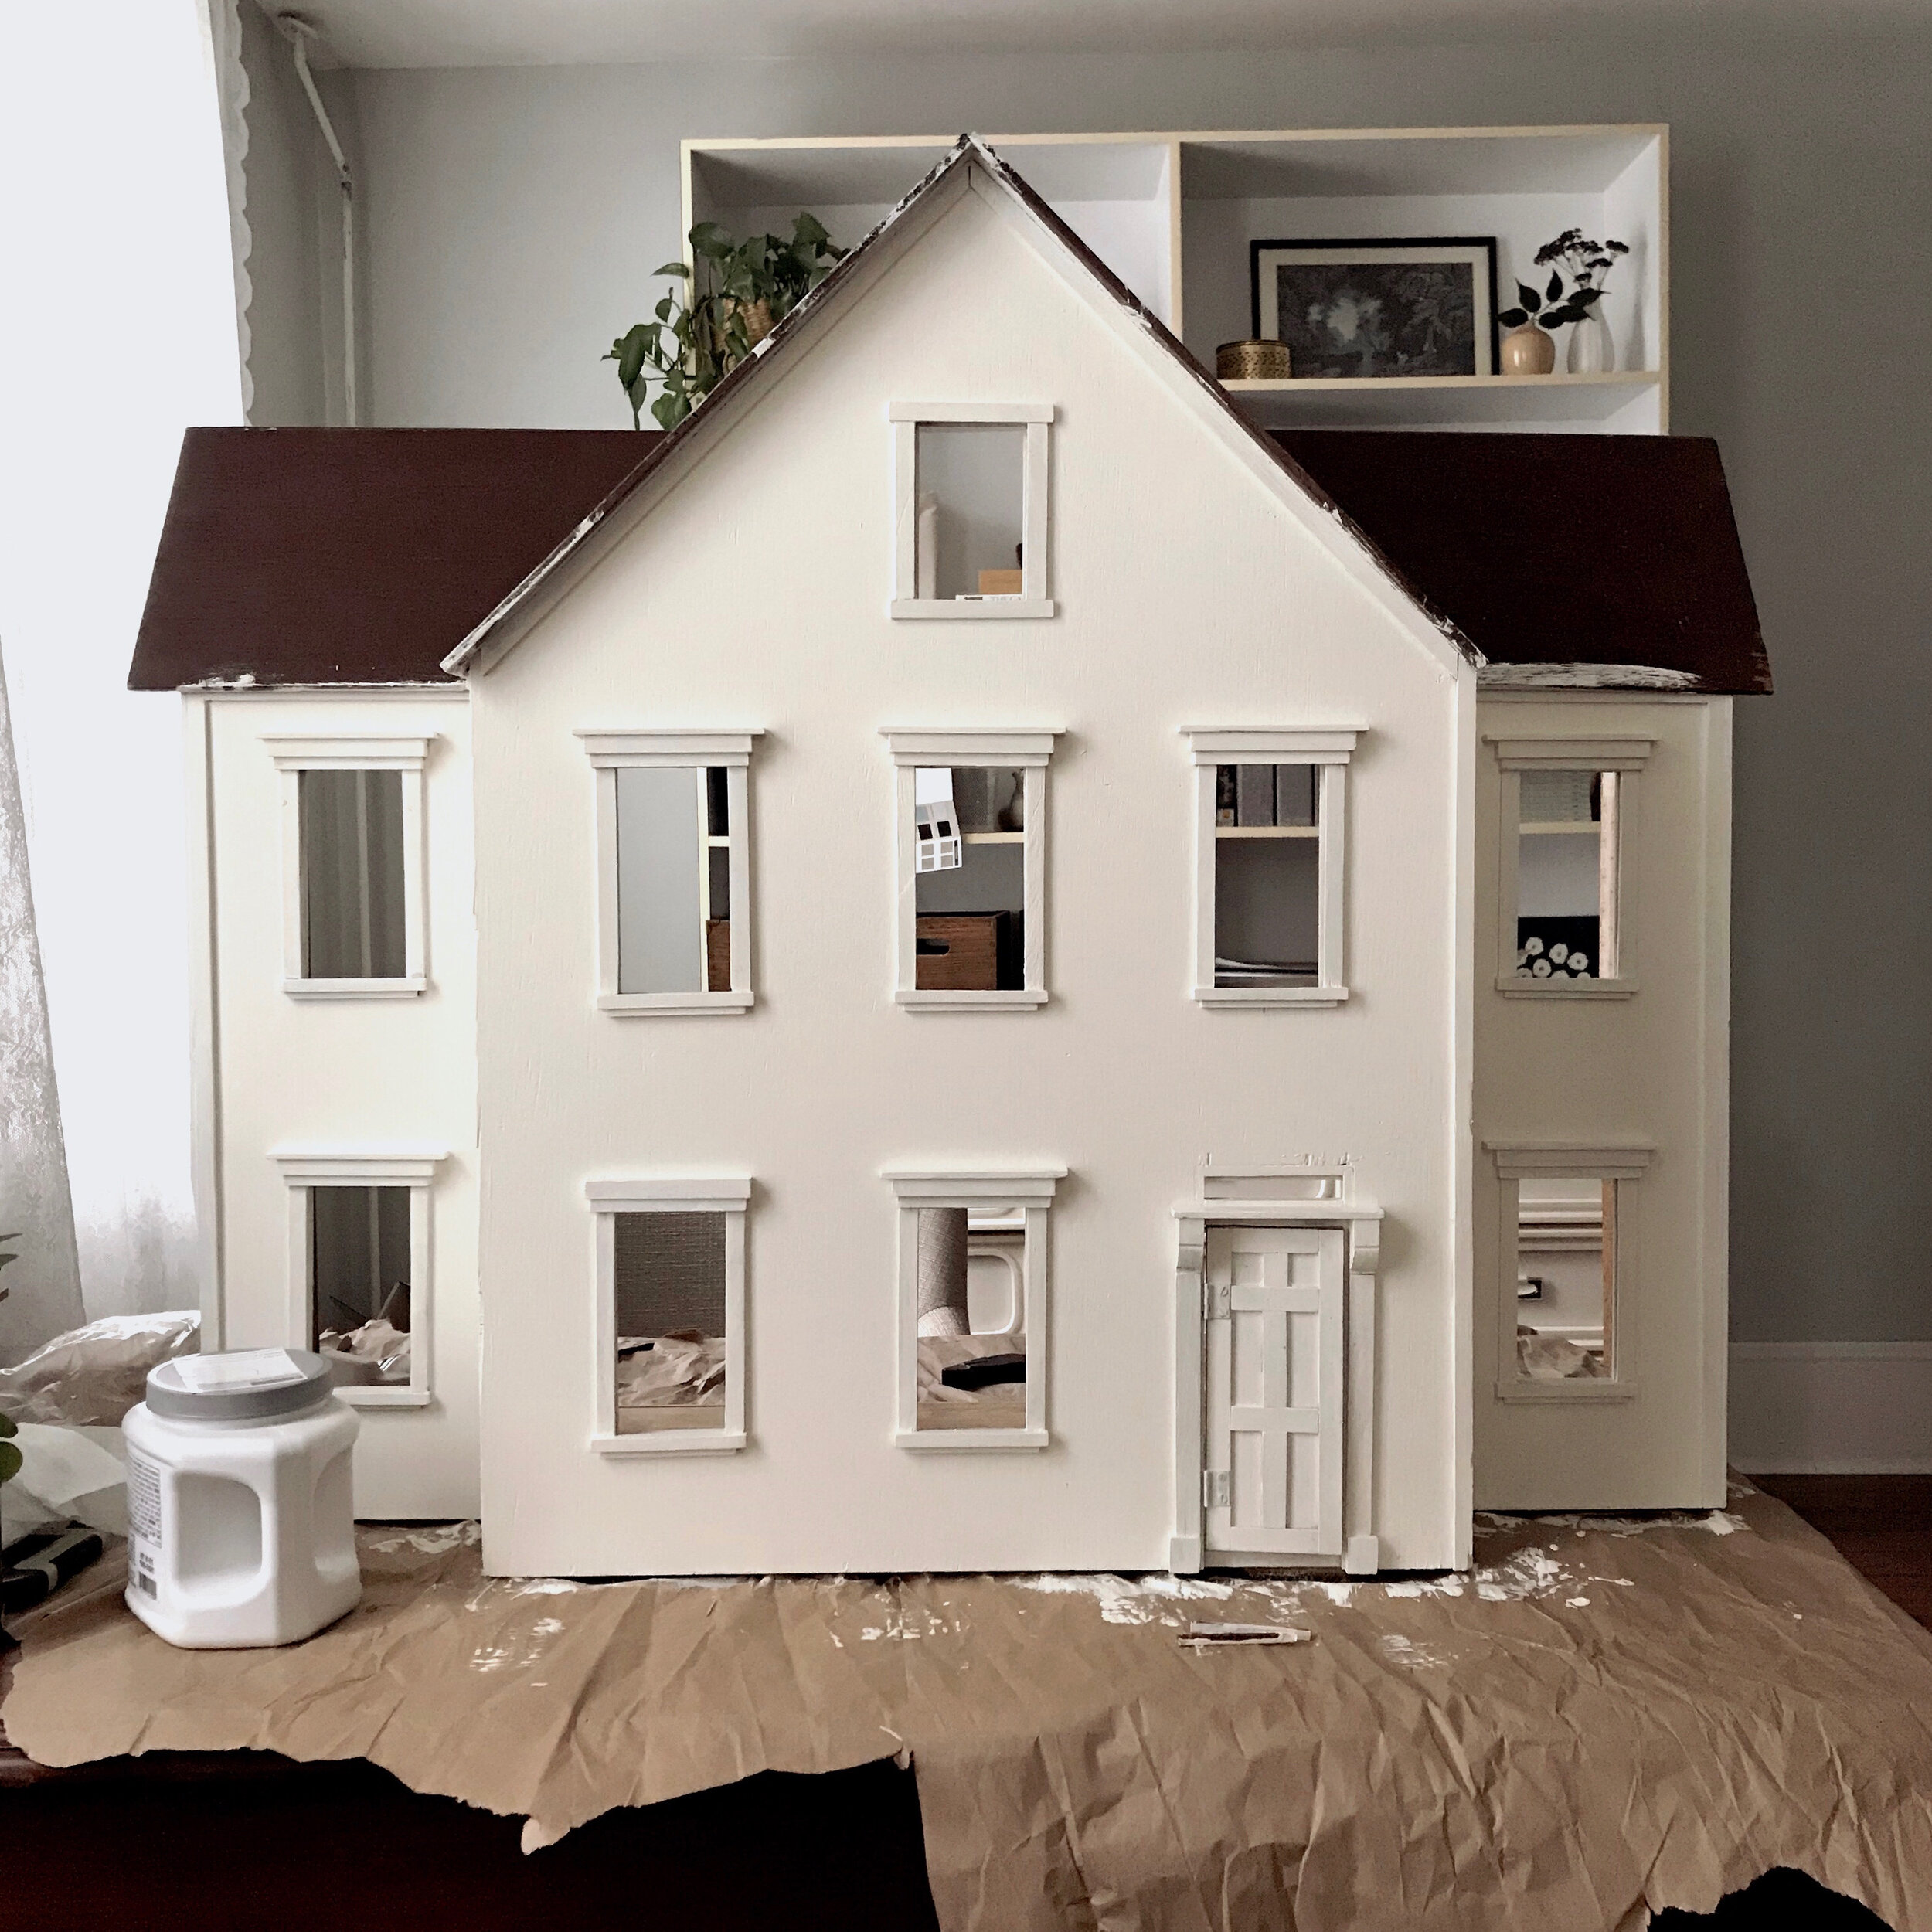
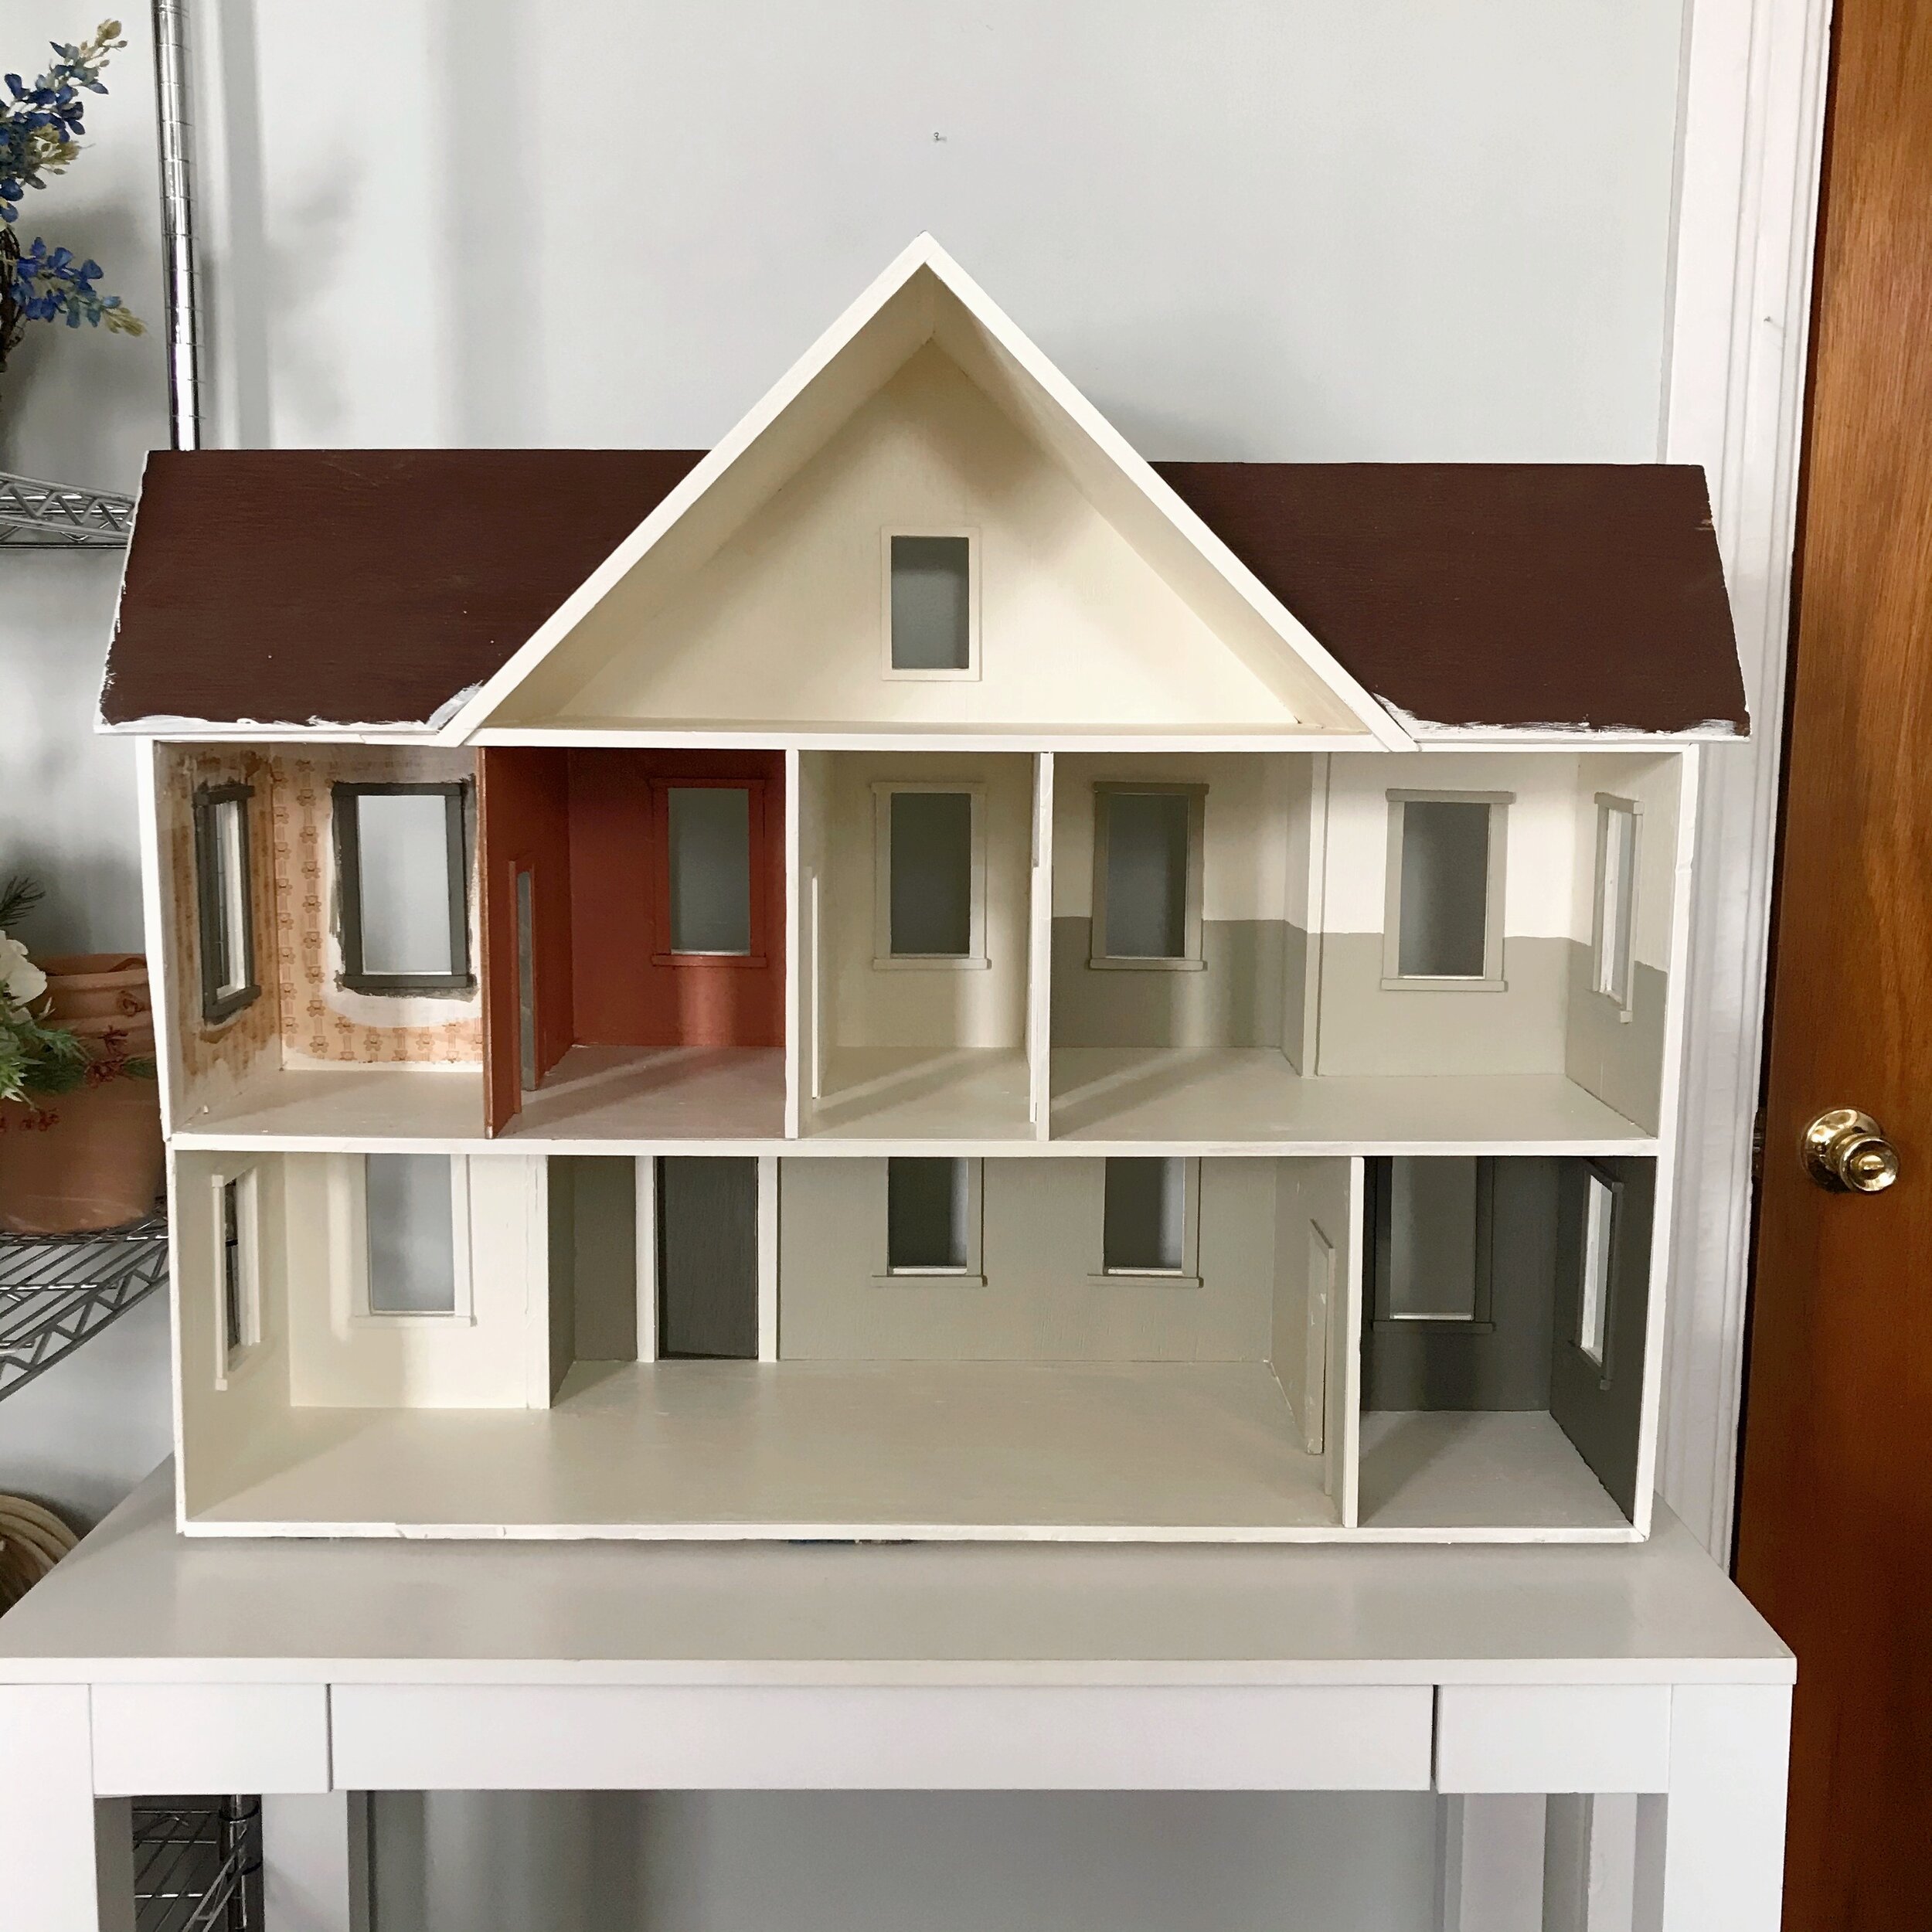
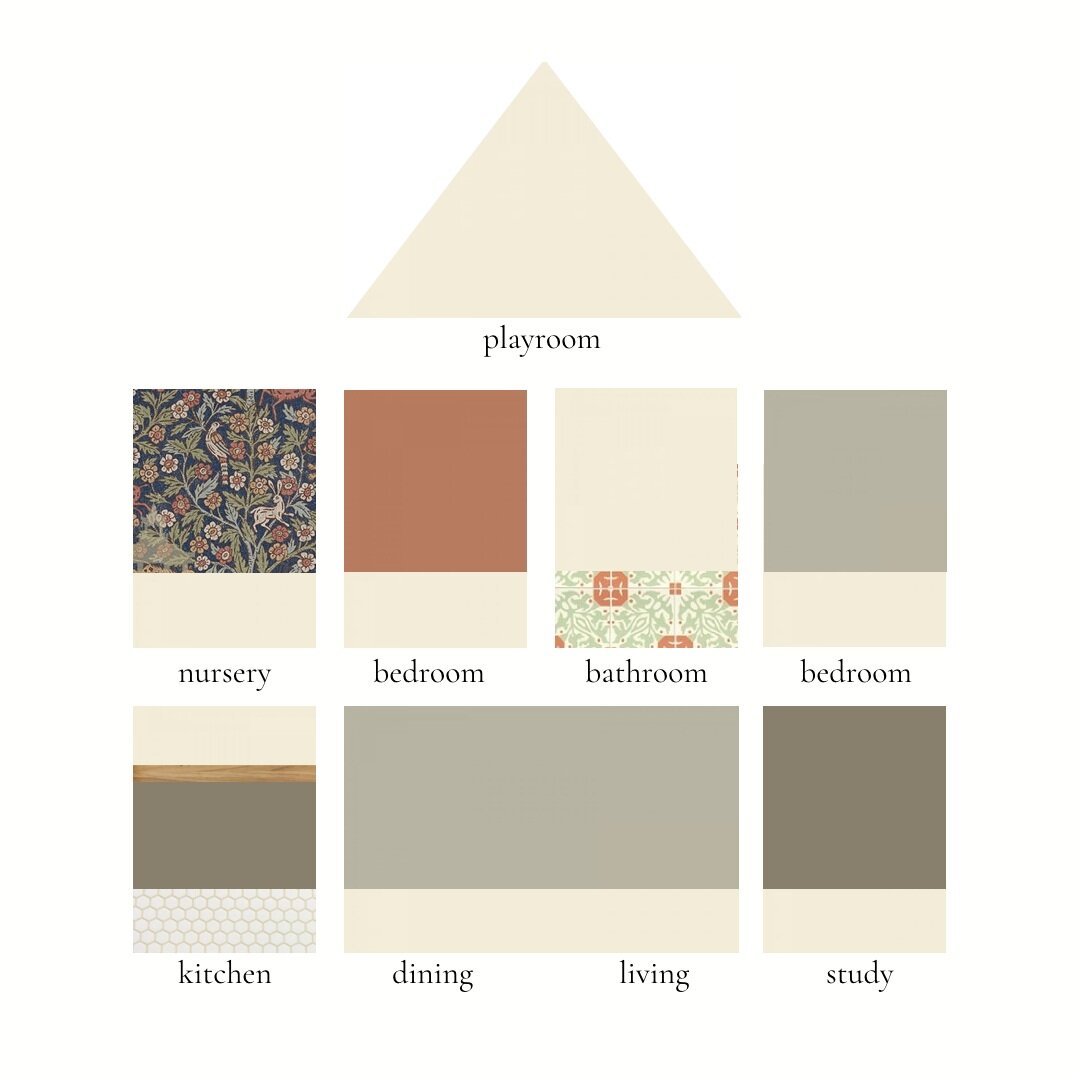
I’m going for a vintage, earthy, cottage-y kind of vibe with my dollhouse renovation. I chose a pared back color scheme of cream, olive, terra cotta and rust. I took this photos after painting but before adding wallpaper or flooring. Here’s a look at my paint color scheme alongside the materials I chose to go with it.
Why a pared back color scheme is best
Dollhouses are small and if you choose too many different colors, it can start to look chaotic. Plus, because you can see all of the rooms in your dollhouse at once, you want the rooms to all look and feel cohesive. The easiest way to create a beautiful dollhouse color scheme is to keep it simple. I recommend choosing just 4-5 colors for paint that you will use for the entire dollhouse. Why just 4-5? Because repeating the same colors in different areas of the house you can create balance, harmony and visual flow. I recommend the same thing for full-size houses too! With a little creativity, you’d be surprised at how much variety you can achieve using a minimal color palette.
How to decide what color to paint where
Once you have selected your pared down color scheme, the next step is deciding what goes where. Start with your favorite color of the bunch and give it a prime spot within the house. I love the dark olive green in my color scheme, so I chose it for the kitchen cabinets (which I haven’t built yet) and the walls of the study. By repeating the same color on opposite sides of the first floor of my dollhouse, I’m creating visual balance and cohesion. From there, I chose where my boldest color (the terra cotta) would go, settling on an upstairs bedroom. As I decided what colors to paint the rest of my dollhouse interior, I kept visual balance in mind. Neither side of the house should be too dark or too colorful - the goal is a balanced mix of values (light, medium and dark), neutrals, and colors throughout.
How to create variety in a limited color palette
Think beyond wall paint when it comes to your color scheme! I found a beautiful 1:12 scale wallpaper that featured the cream, sage and terra cotta in my palette for the nursery. The wallpaper also features a golden tan, navy and sky blue that I may use in accents and accessories when I furnish the dollhouse. In the bathroom, I’m leaving the walls white but found a colorful mosaic tile paper that pulls in the sage and terra cotta too. In the main bedroom, I painted a simple wainscoting wall treatment with cream on the top half of the walls and sage on the bottom half and trim. There are a lot of ways to mix up your paint treatments and materials to make the most of a limited color scheme! Just like in real interior design - the wall color doesn’t always have to be the most interesting part of the room. A limited color palette makes a great base for layering on different finishes, textures, materials and accent colors with your dollhouse furnishings.
My Tips for Painting a Dollhouse
Prep your surfaces first. Thoroughly clean your dollhouse before painting and lightly sand any rough areas until smooth. Fill in any cracks with paintable caulk and allow to dry. Make sure your dollhouse is completely clean, dry and free of dust before you start painting.
Use the right tools. For large areas, like the exterior, floors and ceilings I used a 2” angled brush For smaller areas, like interior walls I used a 1” flat artist paint brush. For detail work like trim and cutting in, I used a small 1/4” flat artist paintbrush. (Add photo)
Paint one color at a time. I started with cream, painting the entire exterior, all the interior floors and ceilings and the kitchen, bathroom and playroom walls. Choose a color and start there, thoroughly cleaning and drying your brushes in between colors. Keep in mind most colors will need 2-3 coats.
Work slowly. You can always touch up later, but working in such a tight space requires a steady hand. I chose not to use painters tape and kept a damp rag on hand for drips. But the best results come from carefully painting multiple light coats.
What kind of paint to use
You can use acrylic or craft paint, or you could use regular interior latex paint. I chose to use a mix of leftover interior latex paint I had in our basement and interior paint samples I purchased from Sherwin Williams so I could choose the exact shades I wanted. If you are painting over stained wood or dark colors, it would be good to buy a primer to apply first to get the best coverage.
More simple color scheme ideas
I put out a poll on Instagram for different styles of dollhouses you’d love to see me create color schemes for and you all had a bunch of fun ideas! Feel free to use these combinations for inspiration on your next miniatures project, or really any kind of craft project! These modern, minimal palettes would be great for all kinds of arts and crafts - ceramics, embroidery, knitting/crochet, sewing, painting, jewelry, wreath making, etc.
Ok, I had way too much fun putting those color palettes together! Quick sidebar -for the few years my DIY and crafting hobbies have fallen by the wayside a little bit. Work got crazy and I became a mom so I just felt like I had less time and energy for projects like this. Prioritizing time to make things by hand again has been so wonderful and therapeutic for me during this crazy year. Whether you are renovating a dollhouse too or just following along for fun, I really hope these ideas inspire you to go make something and get creative!
Next up, wallpaper and flooring installation!

